How to Build a Three-Bin Compost System That Actually Works
Build a three-bin compost system that turns yard waste and scraps into rich soil, with real dimensions, materials, and a simple turning routine.
There's a quiet satisfaction in walking out to the garden, lifting a fork of dark, crumbly compost, and knowing you made it from last week's kitchen scraps and a pile of autumn leaves. A three-bin compost system is the setup that finally makes that happen on a reliable schedule instead of leaving you with one sad, slimy heap that never quite finishes.
If you've struggled with a single bin that stays half-rotted for a year, the problem usually isn't you. It's the design. Here's how to build a three-bin compost system that keeps material moving and actually produces usable soil.
Why Three Bins Beats One
A single pile has a stubborn flaw: you keep adding fresh scraps to the top while the bottom is trying to finish. Nothing ever gets to fully mature because you're constantly reintroducing raw material.
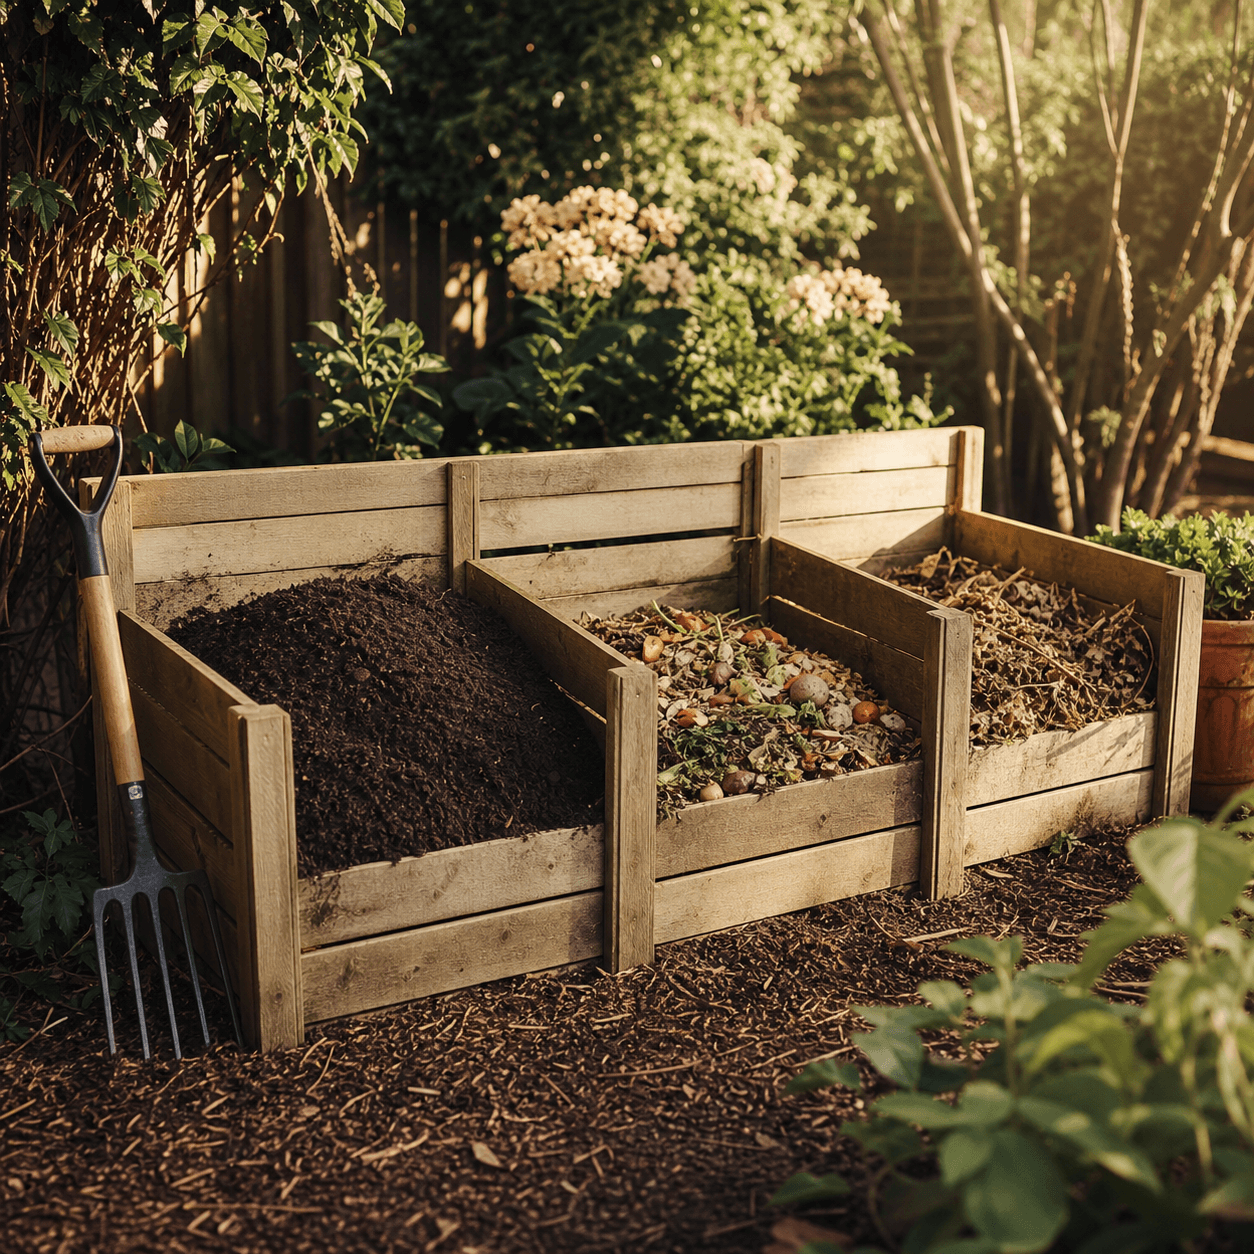
Three bins solve this by separating the process into stages:
- Bin 1 holds fresh material you're actively adding to.
- Bin 2 holds a full batch that's actively cooking and breaking down.
- Bin 3 holds finished or nearly finished compost, ready to use.
As Bin 1 fills up, you turn its contents into Bin 2. When Bin 2 matures, it moves to Bin 3. This flow gives the pile the two things it needs most: oxygen from turning, and time to finish undisturbed.
Sizing and Materials
The sweet spot for each bay is roughly 3 feet wide, 3 feet deep, and 3 feet tall. That cubic yard of volume is large enough to hold heat, which is what drives fast decomposition. Much smaller and the pile won't reach the 130 to 160 degree Fahrenheit range that kills weed seeds and speeds breakdown.
For a standard build you'll need:
- Rot-resistant lumber like cedar, or untreated construction lumber if you accept it will weather faster. Avoid pressure-treated wood in beds where you grow food.
- Four corner posts plus dividing posts, cut to about 3.5 feet so you can sink them a few inches.
- Slats or boards for the sides, spaced about an inch apart for airflow.
- Galvanized screws, a drill, and hardware cloth if you want a rodent-resistant base.
Pallets are the budget shortcut. Four pallets stood on edge and wired together at the corners make one bay in about twenty minutes. Line up three rows and you have your system for the cost of a spool of wire.
The single best upgrade is removable front boards that slide into a slotted channel. Being able to drop the front wall turns a back-breaking turning chore into a five-minute job.
Building It Step by Step
Pick a level, partly shaded spot with decent drainage and easy hose access. Full sun dries the pile out; deep shade keeps it soggy.
- Set the posts. Space them to create three 3-foot bays sharing common dividers. Sink each post 6 to 12 inches into the ground and check for level.
- Attach the back and sides. Screw your slats horizontally with roughly an inch of gap between boards. Airflow is the goal, not a solid wall.
- Build the dividers. These interior walls let each bin operate independently.
- Add sliding front boards. Screw a vertical channel to the front of each post so boards drop in and lift out. This is what makes turning painless.
- Lay a base layer. Coarse twigs or wood chips on the ground improve drainage and airflow from below.
Keeping the System Running
Fill Bin 1 as scraps and yard waste accumulate, alternating browns and greens and keeping the mix about as damp as a wrung-out sponge. Once it's full, fork everything over into Bin 2. That single act of turning mixes materials, adds oxygen, and usually triggers a satisfying heat-up within a day or two.
Turn Bin 2 every one to two weeks to keep it aerated. In warm weather a well-balanced, regularly turned batch can finish in two to three months. In cool weather it may take twice as long, which is completely normal. When the material is dark, crumbly, and smells like a forest floor rather than like the food that went in, shovel it into Bin 3 to cure.
Reading the Pile
A few quick diagnostics save a lot of guesswork:
- Sour or ammonia smell: too wet or too many greens. Mix in dry browns.
- Not heating up: too dry, too small, or short on greens. Add water and nitrogen-rich material.
- Finished on the outside, raw in the middle: it needs turning so the edges reach the hot center.
Putting the Finished Compost to Work
Cured compost from Bin 3 is one of the best things you can give your garden. Spread an inch or two over vegetable beds and rake it in, mix a few handfuls into planting holes, or brew a small amount into a top-dressing for containers. It improves soil structure, feeds beneficial microbes, and helps sandy soil hold water while loosening heavy clay.
Once you've cycled through a full rotation, the rhythm becomes second nature: fill, turn, cure, repeat. That's the whole promise of a three-bin system. Instead of one neglected heap, you get a small, dependable soil factory that runs on the stuff you were going to throw away anyway.
Frequently Asked Questions
How big should each bay in a three-bin compost system be?
Aim for roughly 3 feet wide, 3 feet deep, and 3 feet tall per bay. That cubic yard of volume is large enough to hold heat, which is what drives fast decomposition and lets the pile reach the 130 to 160 degree Fahrenheit range that kills weed seeds. Much smaller than that and the pile struggles to heat up and finish quickly.
How does material move through a three-bin compost system?
You add fresh scraps and yard waste to the first bin. Once it fills up, you fork everything into the second bin, where it cooks and breaks down as you turn it every week or two. When that batch is dark and crumbly, you move it to the third bin to cure while a new batch starts in bin one, giving you a steady rotation.
Can I build a three-bin composter out of pallets?
Yes, pallets are the cheapest way to build one. Stand four pallets on edge and wire them together at the corners to form a single bay in about twenty minutes, then line up three rows sharing common walls. The gaps between pallet slats also provide the airflow the pile needs.
Where is the best place to put a compost bin in the yard?
Choose a level spot with decent drainage and easy hose access, ideally in partial shade. Full sun tends to dry the pile out too fast, while deep shade keeps it cold and soggy. A base layer of coarse twigs or wood chips underneath improves drainage and airflow from below.
What is the ideal ratio of browns to greens in a compost pile?
A good target is roughly 2 to 3 parts browns to 1 part greens by volume. Browns are dry, carbon-rich materials like leaves, cardboard, and straw, while greens are nitrogen-rich items like food scraps, fresh grass, and coffee grounds. Too many greens and the pile smells; too many browns and it stalls, so when in doubt, add more browns.
James Carter
Composting & Soil Specialist
James is a lifelong allotment grower who's happiest with a fork in a compost heap. He covers composting, soil health, and closing the loop in the garden. More from James →